

A total of 868 characters, expected to take 3 minutes to complete reading.
Re-engraving LiThermal
can be concerned LiThermal is creating an open source platform. Published tutorials.
According to the tutorial, print the circuit board and solder the components, as shown in the figure below.
")
After the welding is completed, 32G The following memory card is swiped to the system in the tutorial and checked in the TF card slot, then you can start the machine! At this point the screen should be lit!
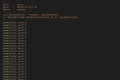
And connected to the computer, the computer device manager will display the device as shown in the figure below.
")
If not show this device! Please check the welding or TF card! The problems I encounter here are all caused by virtual welding!
Then I modified Revision Firmware The firmware download is dropped to the root directory. At this time, the system will be stuck in the connected interface because we have not connected the camera yet.
")
We disassemble Hikvision TB4117 (be careful! Please follow the tutorial before disassembling Return to NCM Modeand set the specified password!), Get the motherboard and its camera components. Then remove the terminals on the motherboard.
")
Note that there are many capacitors and resistors next to the terminals, don't get rid of them! It is recommended to cut off the plastic part of the terminal before removing it.
Then it is fixed on the 3D shell as shown below.
")
Should be able to start normally. If you have any other questions, please leave a message at the bottom of the page!
")
Revision Firmware
Revision of the firmware please view my project:https://github.com/mcdudu233/LiThermal-Revised.
I modified the code of the original firmware and added the following functions.
| Function | Original | Revision | Remarks |
|---|---|---|---|
| Built-in Cursor | ○ | √ | The original version does not support the built-in cursor display of the center temperature |
| average temperature | x | √ | |
| Electric quantity display | ○ | √ | The original version only supports voltage display, and ignores the voltage drop caused by the diode. |
| Charging display | ○ | √ | The original is not friendly enough for charging display. |
| Record MP4 video | x | √ | Revised version adds recorded video format selection and captured picture format selection |
| OSD settings and camera settings | ○ | √ | The original version does not support setting the brightness, contrast and other parameters of the camera. |
| Web Page Forwarding | x | √ | |
| RSTP Flow Forwarding | x | √ |
Now supports the built-in center temperature display and average temperature display, as shown in the figure below. And the temperature UI refresh rate is 10hz as the original, but the center temperature display function is changed to 5hz (hardware limitation).
")
I also increased the format selection when taking photos and recording, and supported recording MP4 video! There is no need to transcode before playing like the original version!
")
Also increased the power display function, rather than the voltage display, more practical!
")
For the settings main menu, added OSD settings and camera settings, modify the logic of some functions.
")
")
do not have to enter the background settings page salvation can set the parameters of the camera!
")
By the way, I changed the UI icon of the photo album, and the picture also showed the icon.
")


Boss, can I record video to OSD at the same time?
@ACC At present, it should not be possible. Then we'll see if we can add it.